When modifying these docs, its useful to run the website locally.
Installation instructions
You will need to install Jekyll.
Mac instructions
If you do not have Rubygems installed, you will need to do that first. Using brew (see install instructions here) run,
brew install ruby
You may need to update your path once installed. The instructions for this should pop up at the end of the installation. For example,
Removing: /Users/torres/Library/Logs/Homebrew/unbound... (64B)
Pruned 0 symbolic links and 10 directories from /opt/homebrew
==> Caveats
==> ruby
By default, binaries installed by gem will be placed into:
 /opt/homebrew/lib/ruby/gems/3.3.0/bin
You may want to add this to your PATH.
ruby is keg-only, which means it was not symlinked into /opt/homebrew,
because macOS already provides this software and installing another version in
parallel can cause all kinds of trouble.
If you need to have ruby first in your PATH, run:
 echo ‘export PATH=“/opt/homebrew/opt/ruby/bin:$PATH”’ >> ~/.zshrc
Once you follow these instructions, open a new terminal window. Run which ruby and that should return the path variable you just set.
Now install the bundler
gem install bundler
Clone the repository
git clone git@github.com:dolbowlab/dolbowlabdocs.git
Navigate into the repository and run,
bundle install
Finally, to start the local server run,
bundle exec jekyll serve
Which should now show
$ bundle exec jekyll serve
Configuration file: /Users/torres/Projects/dolbowlabdocs/_config.yml
To use retry middleware with Faraday v2.0+, install `faraday-retry` gem
            Source: /Users/torres/Projects/dolbowlabdocs
       Destination: /Users/torres/Projects/dolbowlabdocs/_site
 Incremental build: disabled. Enable with --incremental
      Generating...
   GitHub Metadata: No GitHub API authentication could be found. Some fields may be missing or have incorrect data.
                    done in 1.072 seconds.
 Auto-regeneration: enabled for ‘/Users/torres/Projects/dolbowlabdocs’
    Server address: http://127.0.0.1:4000
Navigate to the server address to view the local build of the website.
Linux Instructions
It’s easiest to go through the ruby version manager. Follow the instructions found on their website to install ruby. Follow the command for installing GPG keys and then to install RVM (ignore the option that installs Rails). You may have to install gpg2 first. To do so just do,
sudo apt-get install gnupg2 -y
Once rvm is installed either open a new terminal window or source your current one
source ~/.rvm/scripts/rvm
Then install Ruby
rvm install 3.1.2 --autolibs=3
Autolibs should install all missing dependencies.
Now install Jekyll and Bundler
gem install jekyll
gem install bundler
Clone the dolbowlab labs doc repository
git clone git@github.com:dolbowlab/dolbowlabdocs.git
Navigate to the repository and use Bundler to update any missing dependencies
bundle install
Finally, launch the local server
jekyll serve
Windows Instructions
Why are you using Windows?
Modifying the Docs
For things you only need to modify the files found in the pages folder. The pages folder has a series of markdown folders that consist of the content of the website. mydoc_sidebar.yml shows how all of these folders are related to each other.
For example, this code block,
      - title: GMSH
        output: web, pdf

        folderitems:
          - title: GEO
            url: /gmsh_geo.html
            output: web, pdf

          - title: Python
            url: /gmsh_python.html
            output: web, pdf
produces the structure:
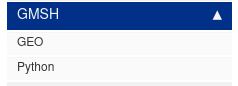
gmsh_geo.html and gmsh_python.html refer to pages/gmsh/gmsh_geo.md and pages/gmsh/python.md respectively (Yes the file extensions are correct).
Page Structure
All pages start with the following block,
---
title: Remote Connection
tags: [remote]
sidebar: mydoc_sidebar
permalink: remote.html
summary: "Set up a tunnel with paraview"
folder: linux
---
The entries are as follows
- Title Title of the page
- Tags Tags associated with page, this helps with searching
- sidebar The side bar associated with this page. We have one sidebar
mydoc_sidebar - permalink The name of the html file this will generate. Keep this the same as the name of the page(minus the markdown extension)
- summary Summary of the contents of the page
- folder Folder name where the page is stored
Below the header is where the body of the page goes. This is all done in markdown. A much more detailed description of this can be found here.
Contributing
The main branch of the repository is protected, meaning that you will need to make a branch with your changes and merge it in.
As long as you are a part of the dolbowlab group on github you will be able to merge in your own pull requests. This buffer exists to allow to you look at your changes one last time before merging them into master. Mainly Make sure the commits being merged in are the ones you created. If you created two commits that you want to merge, then the PR should only show two commits being merged.
There are no tests on the repository so make sure everything works locally before merging.
It is recommened to create a branch on the repository call something like <yourname>draft(eg daviddraft). Just use this as a buffer for your changes and don’t delete the branch when merging.